Start jenkins with Bitbucket
Updated:Categories: Service
Tags: #Jenkins #Continuous Integration #Setup
Jenkins 와 Bitbucket 연동으로 CI 시작하기
기존 작업 방식은 다음과 같음. 개인 컴퓨터(Local)에서 작업 진행 → 개발 서버 git bare repository 에 Commit & Push → git hooks shell script 으로 push 발생 감지 → Bitbucket repository 로 Push → 개발 서버 내 코드로 빌드 및 서비스 재시작
기존 방식에서도 지속적 통합(Continuous Integration, CI)은 하고 있다고 생각하지만, 좀 더 체계적인 관리를 Jenkins를 통해 하고자 함.
Docker로 Jenkins 설치
# LTS (Long Term Support) 버전 설치 (2018.07.07 기준 v2.103)
$ docker pull jenkins/jenkins:lts
Jenkins Setting
설치 후 준비해야 할 사항은 다음과 같음.
- Jenkins plugin으로 Bitbucket Plugin이라는 것을 설치
- ssh 접근을 위한 private과 public key 확보하기 위해,
ssh-keygen 으로 새로 생성하거나 기존 Bitbucket에 등록한 private(
~/.ssh/id_rsa), public key(~/.ssh/id_rsa.pub)를 이용
준비가 되었다면, 아래와 같이 Bitbucket과 연결.
1.새로운 Item 선택하여 Item 생성
2.Configure 메뉴 선택
3.Branch Sources 메뉴 > ADD SOURCE > Single repository & branch > Credentials에서 Add 버튼을 누르면 두 옵션이 나옴.
- 1: 해당 item 한정 인증 정보 등록
- 2: 글로벌한 인증 정보 등록.
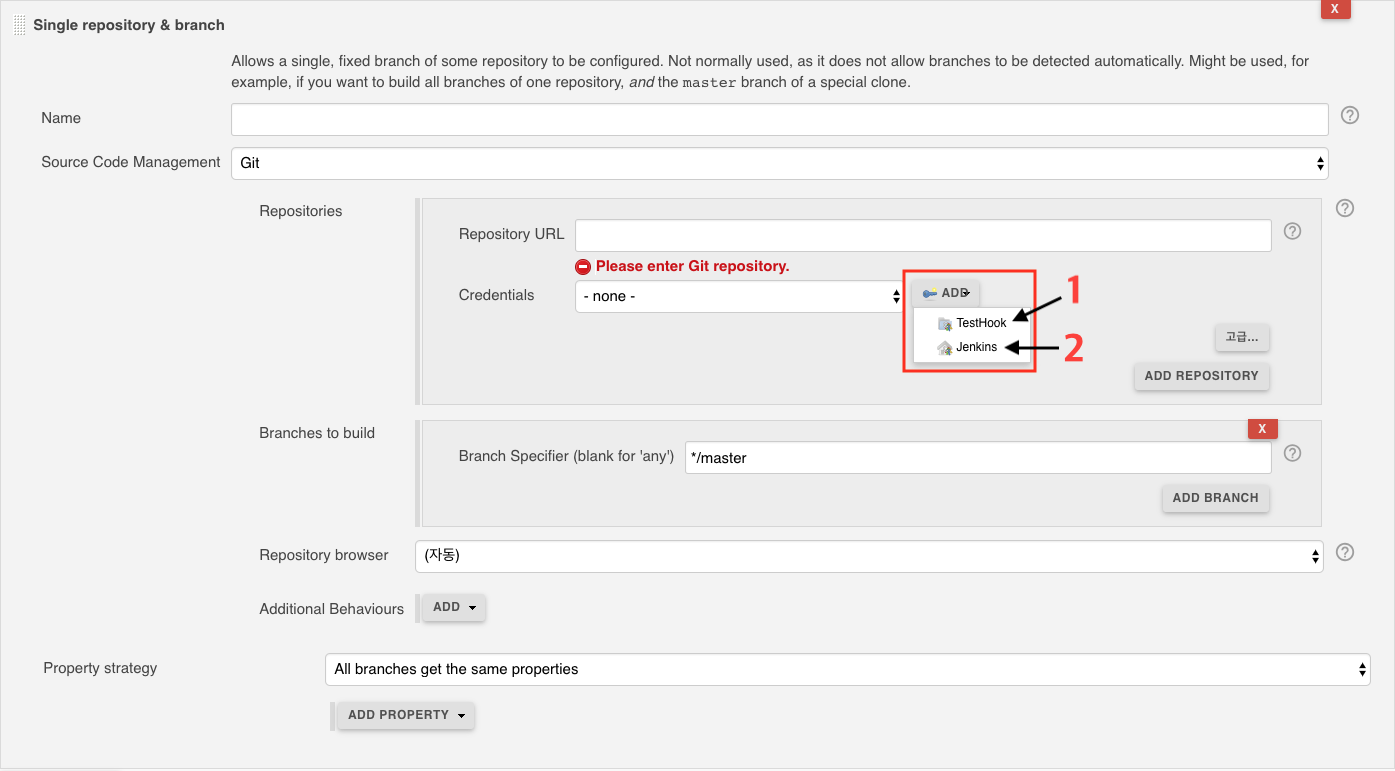
인증 방법에는 여러가지가 존재하지만, 여기서는 ssh로 인증.
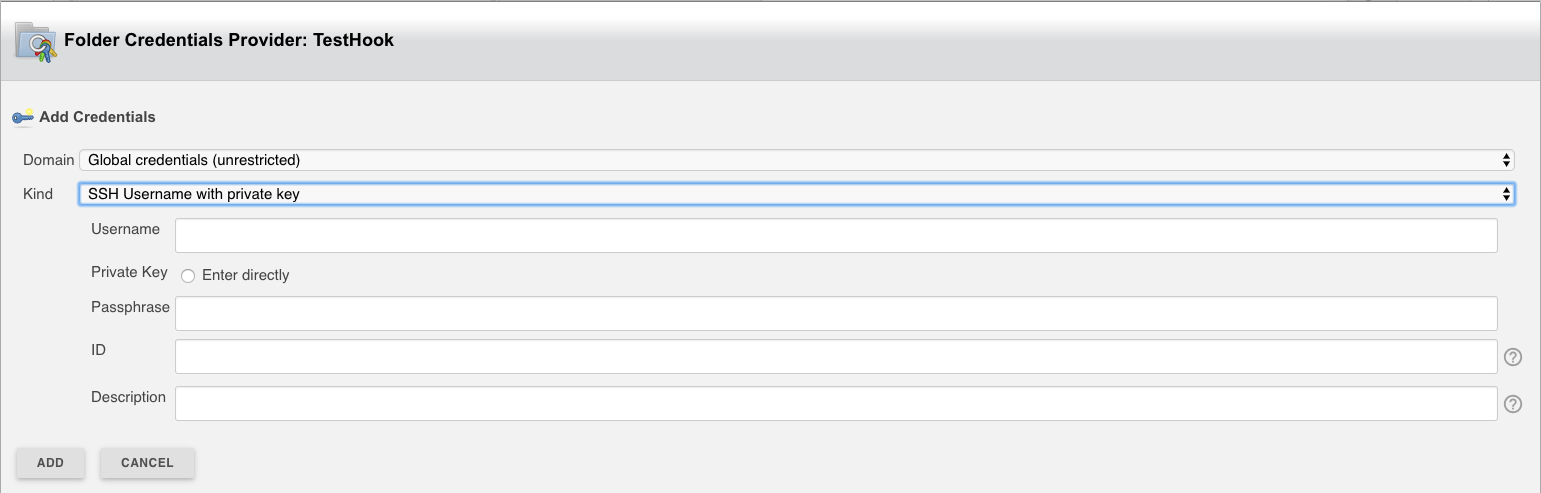
SSH Username with private key를 선택하고, Username은 Bitbucket id. Private Key는Enter directly라디오버튼을 클릭하여 위에서 확보한 private key를 입력. Passphrase와 ID는 ssh-keygen으로 키를 만들때 사용한 정보가 있다면 입력하면 됨
4.Build Trigger 메뉴 > Build when a change is pushed to BitBucket 체크
그 이후 Build 및 Post-build Action은 프레임워크나 빌드 툴에 따라 다르게 설정.
Bitbucket Repository Settings
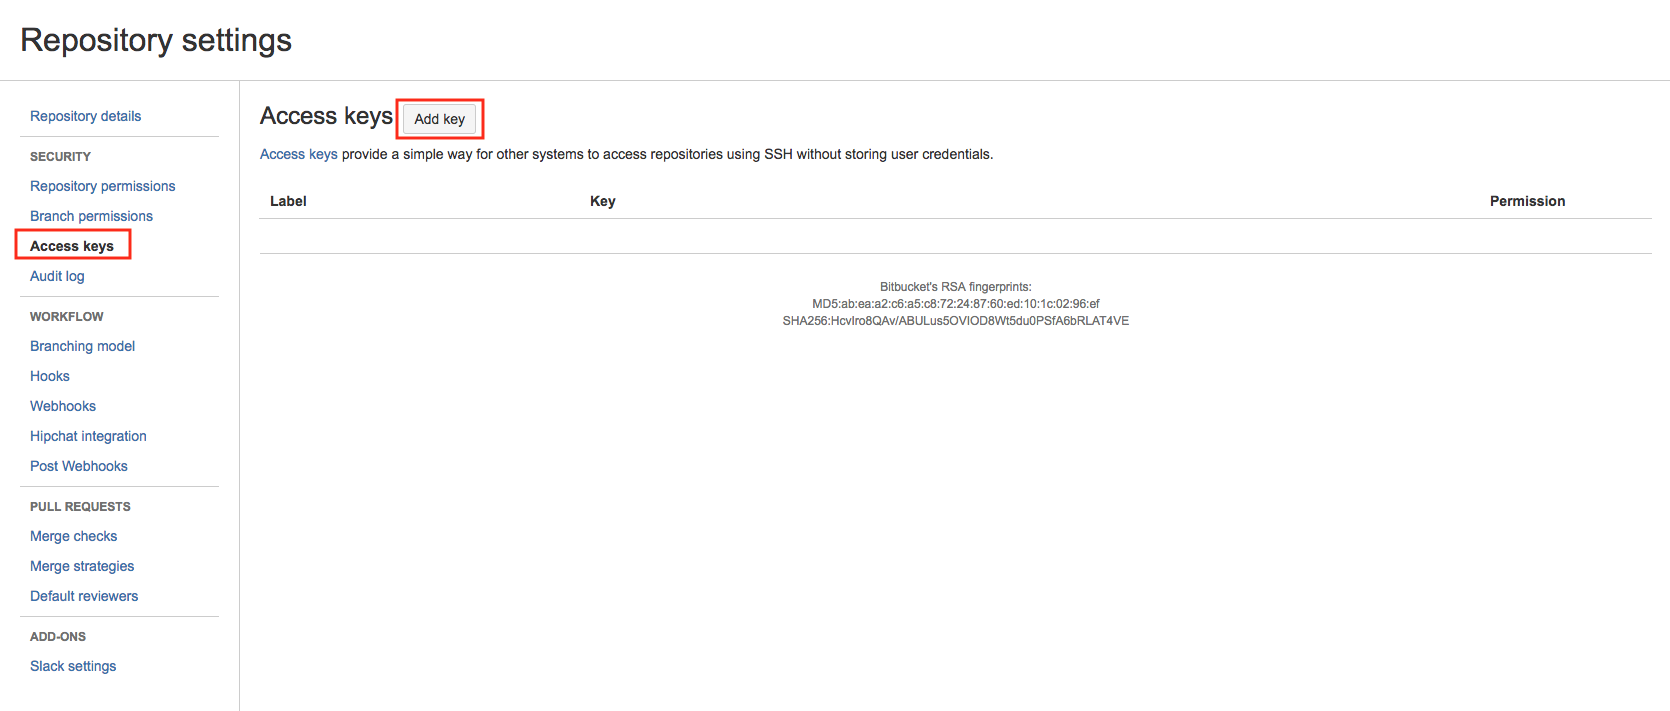
Bitbucket (Stand alone) 내 Repository Credentials 설정
Jenkins에서 bitbucket의 repository에 접근하여 프로젝트를 clone할 수 있도록, 아래 메뉴에 들어가서 위에서 생성한 public key를 입력
Post Webhooks 적용
post webhook으로 만들어야함. (Jenkins Bitbucket Plugin의 버전이 다른지 webhook으로 되어있는 블로그들을 보고 따라했다가 commit 시, bitbucket에서 jenkins로 request도 잘 가고, response도 200으로 잘 오는데 jenkins 에서 trigger가 안되는 현상 존재.)
Repository 내 Post Webhooks 에서 Add webhook 선택
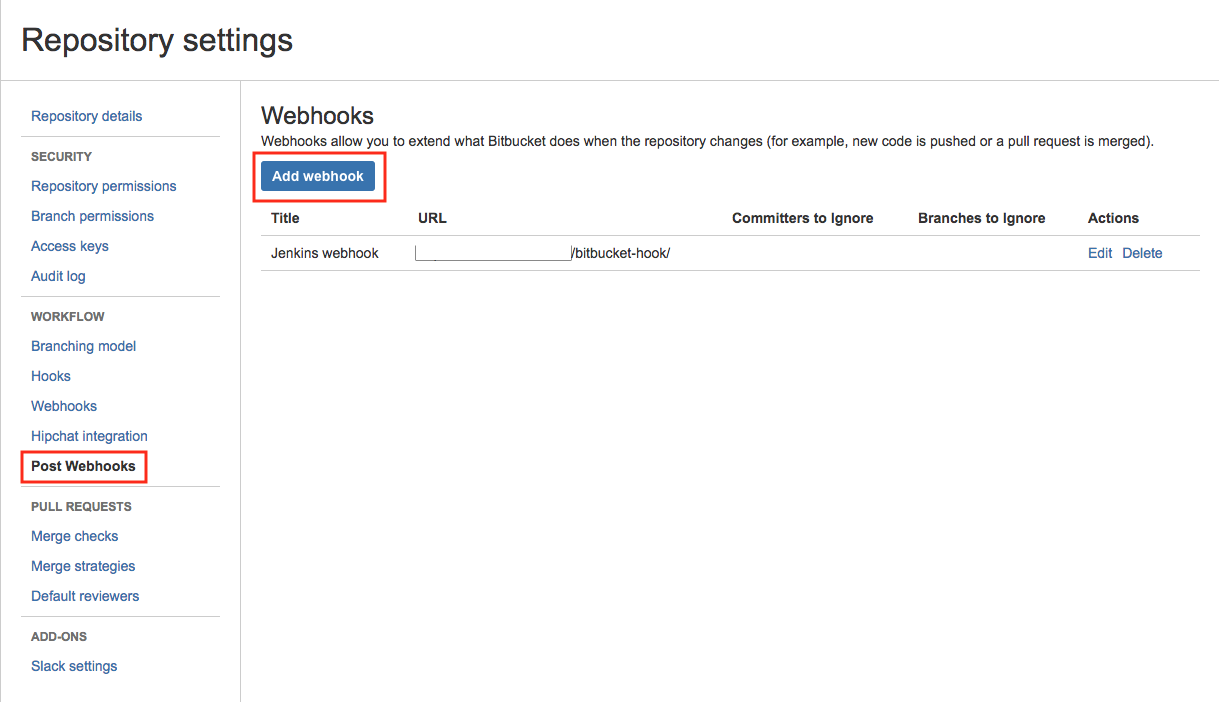
빨간별로 표시된 정보들을 입력 (URL은 {jenkins base url}/bitbucket-hook/)
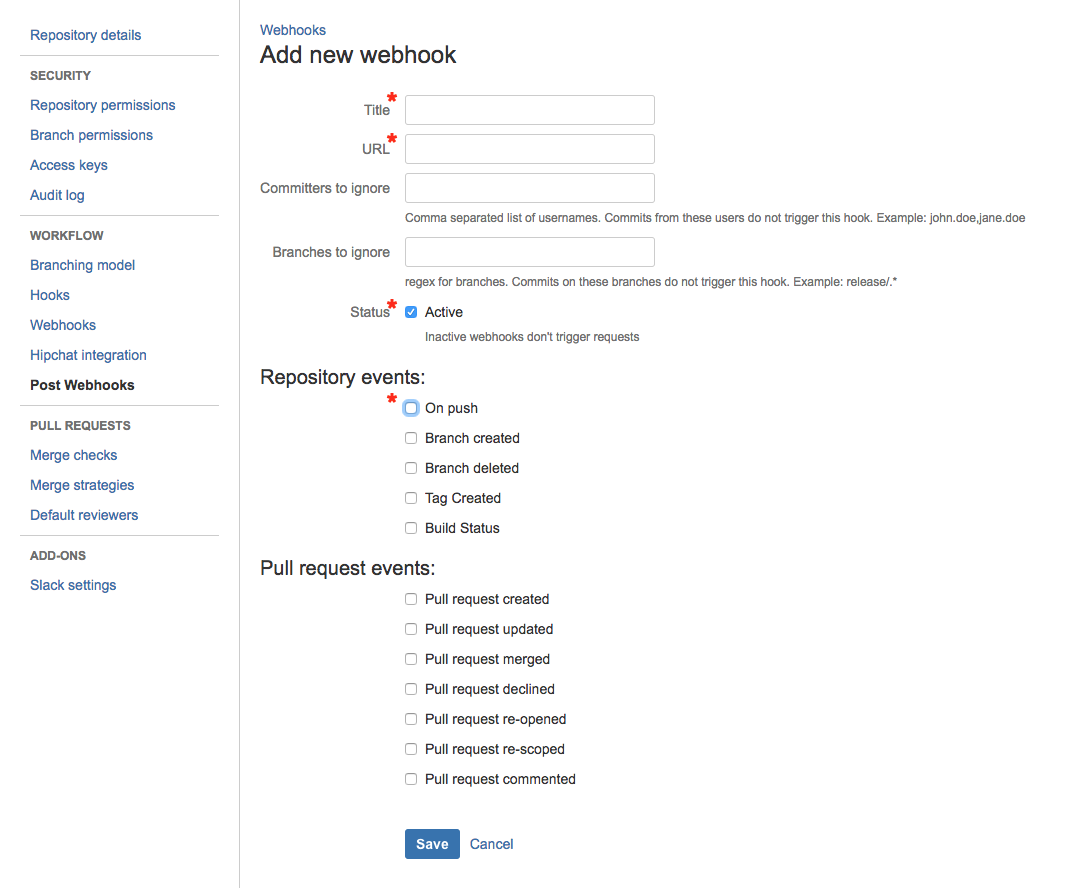
Save를 하면 다음과 같이 나타남.

느낀점
코드를 통합하고 최신 코드로 서비스를 재시작 해주는 동작만으로는 Jenkins가 shell 스크립트를 이용한 것과 크게 다르진 않음. Jenkins 내에서도 shell 스크립트를 사용하여 그러한 동작을 정의했기 때문일 수도 있음. 하지만, 빌드&배포 프로세스를 스크립트로만 관리하는 것이 아닌 그 과정을 구조화하여, 각 과정에 대한 정의를 명확하게 할 수 있음. 또한, 빌드 히스토리를 UI를 통해서 볼 수 있는 장점이 있는 것 같음.
Comments